Q&A

How To Buy Coffees for Competitions

We love working with coffee professionals who are competing in local and international competitions. These events are a great showcase for our producing partners, and the skills of talented and dedicated baristas, brewers and roasters. 

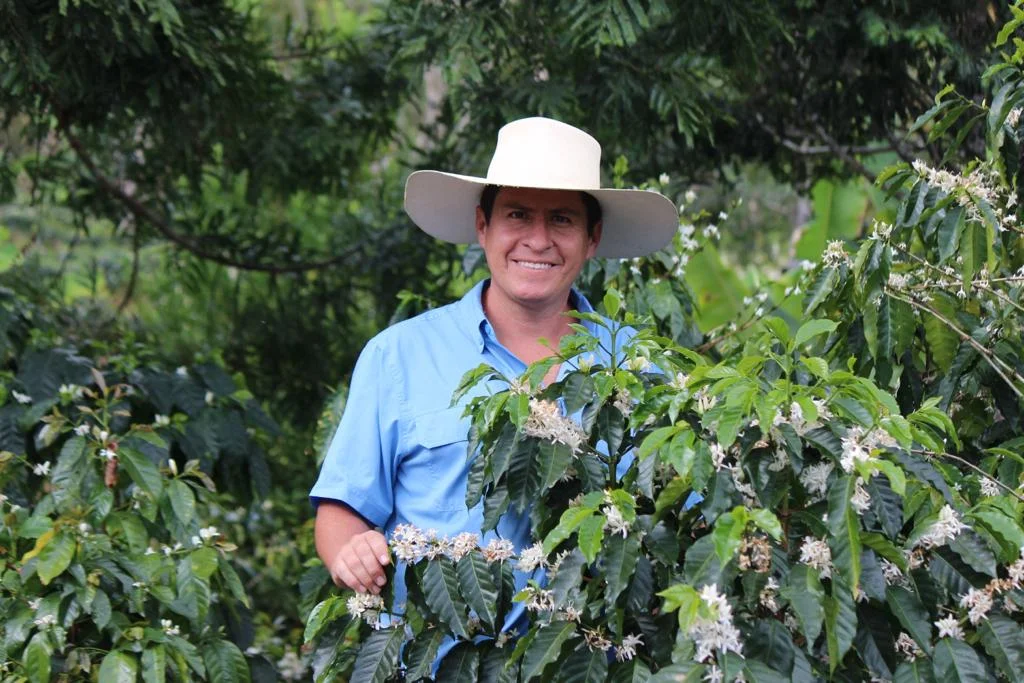
To stand out in these competitions, you need a distinctive coffee with a great story, and we have some limited edition coffees, available in Europe, which can give you the edge you need. Just ask Tom Kuyken, Norwegian Brewers Cup champion 2018, and Agnieszka Rojewska, 2018 Polish Barista Champion, who both won with distinctive and fascinating coffees from our partners in Cundinamarca, Colombia, La Palma y El Tucán.

Veronika Galova Vesela is our sales rep in charge of competition coffees. Check out the full selection in our new CCS Competition Coffees store on Cropster Hub, and Veronika can help you find that dream coffee for your upcoming competition. 
 

WHAT YOU NEED TO KNOW

Green coffee buying can be somewhat confusing if you haven’t done it before, and it can be expensive to buy a single bag. When searching for that special coffee for your next competition, here are a few things you should know in advance. 


IN EUROPE we can only sell to companies, not individuals

This is for tax reasons. When a coffee arrives in our warehouse in Antwerp or Hamburg, tax is yet to be paid. The amount of tax charged depends on which EU country the coffee is sold to. In order to calculate the tax, and which country receives it, we need an EORI number and a Customs Clearance Contract, which only companies can apply for. If you are competing on behalf of a café or roastery, they can purchase the coffee for you. 


There are costs beyond the cost of coffee

In addition to the price of the coffee, there are some extra costs you need to consider. 

1. Customs Clearance
In Europe, for orders of less than a full pallet (10 bags), there is a Customs Clearance Fee of $120 per order. This fee is waived if you order a full pallet, so if you work with a roastery, you might consider buying a full pallet. You can buy different coffees to fill a pallet. 

2. Palletization
Shipping companies like TNT and DHL will not collect or deliver individual bags of coffee, they must be put on a pallet. Palletization, strapping and wrapping costs $38 USD in Europe, and $25 USD in the US. That’s a flat fee for an entire pallet, whether it contains one bag or ten.  
 

A Step by Step Guide to Buying Competition Coffee
 

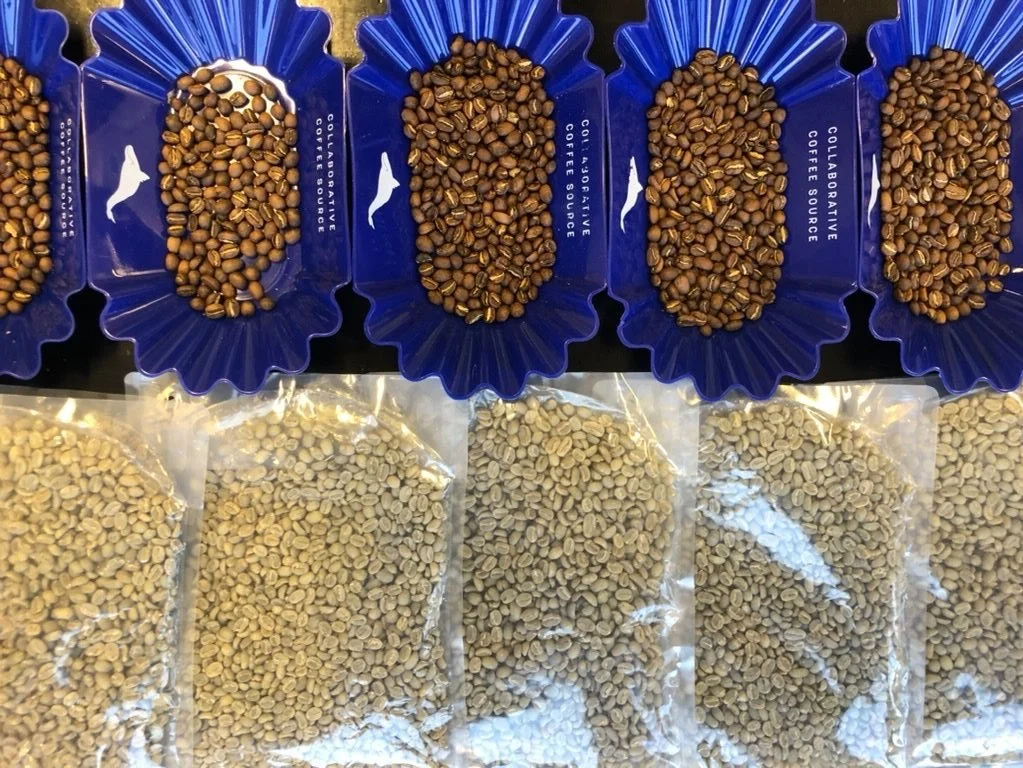
1. Choose your coffee

We have selected some coffees that are delicious, unique and fascinating, and put them all in a special store on Cropster Hub. Browse our selection and order a sample. 


2. Compile all the necessary documentation

In Europe there are two essential documents you will need. 

EORI Number
If the coffee will be shipped to a country in Europe, we need an EORI for tax purposes or our warehouses can’t release the coffee. Generally it’s not hard to get one, just ask your national tax authority. Customers in Switzerland, Iceland and Norway are exempt from EORI.  

Customs Clearance Certificate
Customers in Europe must complete and sign a Customs Clearance Certificate. You can download it here
 

3. Calculate the total cost

If you are in Europe and planning to buy just one bag, calculate the full cost of the bag, plus $120 for Customs Clearance and $38 for palletization. 


4. Contact our Sales team

Email Veronika to discuss your vision for your competition. Make sure to let her know the following information:

  • Company name.

  • Billing address.

  • Your delivery address including phone number and delivery contact (this can be different from the billing address).

  • Your EORI number. (Remember, Switzerland, Iceland and Norway are exempt.)  

  • A signed version of our Customs Clearance Contract.

And don’t forget to let us know when and where you’re competing. We will be your social media cheer squad! 

Good luck. 

Tom Kuyken's winning brew at the Norwegian Brewers Cup was a Sidra Natural from La Palma y El Tucán. 

Tom Kuyken's winning brew at the Norwegian Brewers Cup was a Sidra Natural from La Palma y El Tucán. 

Matt answers your coffee roasting questions: roasting resources

This week Matt Hassell, Global Buyer, QC & Sample Management for Collaborative Coffee Source, and former roaster for George Howell Coffee, has been fielding your questions about coffee roasting on Twitter. @kbaker332 asks:

@collaborativeCS What made you first interested in roasting? Did you have a natural affinity for it or did you draw from any other sources to expand your knowledge and improve? #ccsQandA

— Kevin Baker (@kbaker332) December 13, 2017

Matt's response:

I mentioned in an earlier post that there are more roasting resources now than ever before. Without some of these, I would not have made anywhere near the progress that I did. We’re lucky to live in an age where information is freely and openly shared, and I’m glad to see that roasting is (now) no exception. So, in no specific order, here are some resources for new/curious roasters that have been very useful to me:

1. The Coffee Roaster’s Companion by Scott Rao I think this book does a great job of building fundamentals of roasting. When I started roasting, it was very much a trial-by-fire type deal. This was one of the first resources that I came across that forced me to rethink how I was approaching my roasts. It made me think about it as a process, instead of trying the same things over and over. I wouldn’t say I agree with 100% of the theories detailed in this book, but I haven’t seen a publication yet that everyone will agree on entirely. You will come away from this book better off than you started.

2. Mill City Roasters ‘Roaster School’ This web series has it all. It is super in-depth, and they do a very good job explaining principles of roasting in a way that can be immediately absorbed. Really, “Joe Morocco” might be one of the people that has helped me progress most in my career, despite only having maybe one conversation ever? Which reminds me…

3. Roaster’s Guild/Roaster’s Guild Retreat (Roaster’s Camp for Roaster’s Guild of Europe) Unfortunately this isn’t available everywhere, but going to just one of these was integral to my development as a coffee professional.

The conversation I had with Joe was minor. In fact, it was more of a group discussion. Day one of the retreat seemed a little bit like the first day of high school: kind of cliquey, and quiet. I was sitting in a group, and Joe was talking about getting people to open up and share. Long story short, Joe decides to put his money where his mouth is, and posted one of his profiles online, as to say, “you can’t steal someone’s business with a roast profile.” The next day, people are huddled together at tables drawing their profiles to the best of their recollection. The flood gates opened, and it was suddenly okay to share information. The next three days were a whirlwind of information.

They do a wonderful job putting these events on, and they get better every year. If you ever get the chance to go to one of these, absolutely do it. There is no better way to learn than to surround yourself with like-minded people from all over the country/world on a mountain/in the woods with a beer.

4. Modulating The Flavor Profile of Coffee by Rob Hoos You would be wise to just gobble up any resource Rob puts out there. This book is fantastic, and he is a great social media follow on all platforms.  He does a great job detailing specific parts of the roast profile and how it alters the flavor. If you happen to roast on a Loring, he’s a very good resource for understanding how to operate the machine. As I mentioned before, I initially had a hard time finding good Loring resources. He’s one of the best.

Matt answers your coffee roasting questions: Loring vs Probat

This week Matt Hassell, Global Buyer, QC & Sample Management for Collaborative Coffee Source, and former roaster for George Howell Coffee, has been fielding your roast questions. Here’s a question from @jstnkndy:

@collaborativeCS You mentioned Loring in your last post, can you talk about your experience with Loring vs drum roasters? #ccsqanda

— Justin Kennedy (@jstnkndy) December 12, 2017

Matt's response:

As I briefly mentioned in the last post, I have worked on two different machines. The Loring Kestrel S35 and a 1950’s Probat UG-22. Looking back, it was kind of cool having the chance to learn to roast on two vastly different roasters. There is a difference between a person who is a “Coffee Roaster” in every sense of the title, and someone who just operates a coffee roasting machine. I attribute learning to use a second machine as a defining moment when I considered myself a Coffee Roaster. It forced me to understand why things were happening rather than just knowing how to follow a roast profile.

I first learned to roast on the Loring. Not only a Loring, one of the first ones ever made. It was difficult to find much help to improve my understanding because every resource seemed to be about drum roasters, and there are a few major differences with a Loring.

The Loring basically works like this: heat is pulled off the burner through a cyclone by a fan, then forced into the inlet of the drum. That heat is then forced through the bed of beans, and pulled out by a return fan (that returns the air back into the burner chamber) and the process repeats. Only, the drum is stationary, and the beans are churned by spinning paddles. So, there is no conductive heat, only convective.

Heat transfer rates differ drastically between the two methods. This ended up being the biggest difference between the two. The Loring requires a higher relative burner application to achieve similar levels of development. It took me a long time to figure out what the limits were. My better understanding of them, coupled with Loring’s recent upgrades, has given me a new appreciation for the roaster. I prefer the Loring over drum roasters for espresso roasts, and filter roasts for origins that are your ‘bigger body’ or ‘chocolate, caramel based sweetness’ coffees.

There is a lot of information available in print, both physical and digital, that details how a drum roaster works. They are by far the more commonly used roasters, and in my opinion, are much more intuitive. The one I learned on had some minor airflow and burner modifications, but was mostly as originally designed. Despite being twice as old as me, it was a remarkably consistent and produced a very good roast. The drum, being cast iron, stored a lot of heat. I suppose it depends who you ask, but to me, this was a major positive. I liked being able to back off the burner application heavily, and let the momentum of the stored drum heat carry me through some portions of the roast.

The most useful feature of the machine though, was the airflow damper. This damper, located behind the impeller fan (that pulls the air through the drum) could raise or lower the airflow depending on position, thus changing the ratio of convection:conduction. Proper adjustments can really help minimize some of the variables that we face every day in New England (temperature and humidity variance). These two differences, conductive heat and adjustable airflow, really made me feel like I could hit a small sweet-spot on a coffee. It is for this reason that I preferred the Probat over the Loring for brighter fruit, and higher acidity coffees.

Matt answers your coffee roasting questions: washed vs naturals

This week Matt Hassell, Global Buyer, QC & Sample Management for Collaborative Coffee Source, and former roaster for George Howell Coffee, will answer your roast questions. Here’s a question from @AR0101:

@collaborativeCS what do you need to consider when roasting naturals vs washed coffees? #ccsQandA

— Andres Rodriguez Ruiz (@AR0101) December 10, 2017

Matt's response:

I don’t have nearly the experience roasting naturally processed coffees that I do roasting washed processed. Being in my new position, I find myself with a lot more exposure to naturally processed coffees, so I’ve been re-evaluating my approach and understanding quite a bit. Luckily, I’ve found some fantastic resources to aid in the process.

Roasting a naturally processed coffee requires a longer, slower drying phase and a longer development time. The flavor profile of these coffees is enhanced much more with longer caramelization times. A roast that is too fast, or lighter on the development spectrum may present itself as being harsh and imbalanced. Of course, this is a bit of a generalization as a natural Brazilian coffee would definitely require a different roast profile than an Ethiopian counterpart. They would be unique because of other factors (density, concentration of acids and sugars, terroir, etc.) In general, though, longer times pair with the deeper sweetness and bigger body that is characteristic of natural process coffees. In my experience, I’ve always preferred roasting naturals on a Loring over a drum roaster.

With washed process coffees, you’re able to be much more aggressive with heat application. Shorter roast times with lower-end temperatures have always been my preferred method. This is effective in highlighting the higher acidity found in these coffees. Another point to consider is that washed processed coffees often go through more sorting than naturals. Batches of beans that are more refined in terms of sizing, density, and moisture will be easier to develop homogeneously. You run less of a risk of leaving some of the beans underdeveloped.

Counter to roasting naturals on the Loring, I’ve always preferred roasting washed coffee on a drum roaster. I don’t know why either, because it doesn’t necessarily correlate to coffees that I’ve tasted from other roasters.

Matt will be answering your Twitter roast questions until Dec 12, 2017. Post your questions on Twitter to @collaborativeCS and use the hashtag #ccsQandA.

Matt answers your coffee roasting questions: freezing, then roasting

This week Matt Hassell, Global Buyer, QC & Sample Management for Collaborative Coffee Source, and former roaster for George Howell Coffee, will answer your roast questions. Here’s a question from @_mr_B:

Hey @collaborativeCS, when freezing (green) coffee, how much time can/should you wait before roast? And how does it impact roast? #ccsQandA

— Bjørnar Hafslund (@_mr_B) December 7, 2017

 Matt’s response:

I’ve always found that you can roast green coffee 24-36 hours after it is pulled from the freezer. Though in that short of a time, a common issue I came across was that beans on the outer part of the packaging were (obviously) a lot more thawed out than the ones in the center. So, (and this may be easier said than done) you should make your decision based on a sample pulled from the middle to ensure proper defrosting. In my own case, that often meant breaking a vacuum sealed bag to check the middle, which starts the degradation period. It pays to wait a bit longer, and to be totally sure.

An ideal waiting period for defrosting green coffee is more like 72-96 hours. Not only will you then be sure that all the beans are properly defrosted, but that the free-flowing water in the bean has had enough time to migrate back to all portions. When beans are frozen, the water migrates to the center, thus leaving the outside a bit drier. The best way to defrost is much like a drying bed in that a thin, even mass with more surface area will produce better results.

You can run into a couple of issues roasting coffee that has been frozen. If the beans have not had enough time to return to ambient room temperature and are still a bit cold, the first thing you’ll notice in the roast is your bean temperature plummeting. Bean temperature readings typically aren’t a super reliable metric anyways, compound the problem with extra cold beans and you’ll be in a tough spot. Your reaction will be to apply more heat, which will only make it worse. Throw in that the outside of the bean already has less water, and the inner part has more, and you’re headed for an uneven roast with quite a bit of scorched flavor. It is best to wait an extra day or two.

And how does freezing coffee impact the roast? I’ve been asked that question so many times, and it took me a while to figure out the answer. I was in a unique position at George Howell Coffee where the large majority (we’re talking 99%) of all the coffee I had ever roasted had previously been frozen. It wasn’t until recently that I’d had more opportunity to roast coffee that hadn’t.

I would say the biggest difference is that it seems much easier to dry coffee that had gone through the freezing and thawing out process. I attribute this to the breaking of cellular structure during the freezing process. Water expands when frozen, cell walls break, the bean is sort of “broken” or maybe “broken in” is the better analogy. Anyways, it’s more receptive to heat. However, once you’re through the drying phase of the roast, and things have stabilized, it doesn’t appear to follow any other set of roasting principles. You can apply normal theory, and effectively nothing is different. Perhaps I will discover some other abnormalities as I get more familiar with roasting non-frozen coffee.

Matt will be answering your Twitter roast questions until Dec 12, 2017. Post your questions on Twitter to @collaborativeCS and use the hashtag #ccsQandA.

Matt answers your coffee roasting questions: decaf and flavor

This week Matt Hassell, Global Buyer, QC & Sample Management for Collaborative Coffee Source, and former roaster for George Howell Coffee, will answer your roast questions.

Here’s a question from @yet2com:

@collaborativeCS Is there a way to get the same taste out of decaf coffee that you could get with caffeinated coffee? #notodecaf#ccsQandA

— yet2 (@yet2com) December 6, 2017

Matt’s response:

The short answer is – yes. Though, the problem doesn’t come from the roasting process, so much as it comes from how the coffee was decaffeinated. There are a few different ways to decaffeinate coffee.

One of the most common processes is to use a solvent to dissolve the caffeine. Of course, this method is damaging to the flavor because it’s not possible to target just the caffeine. Other positive compounds are also being dissolved in this process and ultimately have a negative influence on the cup. Typically, lesser quality coffees are selected for this method, as the flavor profile is going to be compromised anyways.

Another process for decaffeination is called “Swiss Water Process”. To do this, you take a green coffee extract that has had the caffeine removed, and add it to water to make a solution that still has all the positive compounds found in coffee. Then, you add the coffee that you would like to decaffeinate. The solution will absorb the caffeine through osmosis, and you’re left with what should be the same coffee as before. This method does require a little more cost, and may be the reason why it’s lesser used.

With that said, the decaffeination process does influence how the coffee behaves in the roaster. With solvent based decaffeination methods, it is common practice to roast the coffee darker to add body to a coffee that may be lacking character (due to loss of positive compounds) at lower roast levels. Coffee that has been decaffeinated is typically more porous, and receptive to heat. So, the roasting process is a bit more sensitive. It becomes very easy to influence. Roast levels can also be a bit misleading, as the coffee will appear to be roasted darker than the flavor would suggest.

There are fantastic decaffeinated coffees out there! You may just have to hunt a little.

Matt will be answering your Twitter roast questions until Dec 12, 2017. Post your questions on Twitter to @collaborativeCS and use the hashtag #ccsQandA.

Matt answers your coffee roasting questions: roast recipes

This week Matt Hassell, Global Buyer, QC & Sample Management for Collaborative Coffee Source, and former roaster for George Howell Coffee, will answer your roast questions. Here's a question from Tom D, @ohthecommotion:

How much of the roasting process is "feel" and how much do you think can be taught? Can I follow a recipe and make a great roast or do I need to just do it for a while? #ccsQandA

— Tom D (@ohthecommotion) December 5, 2017

Matt's response:

This question is so excellent because the answer, for me, has changed dramatically in the last few years.

I think it goes without saying that any task or skill you learn requires a certain level of understanding to not only do it well, but to repeat those results. Lord knows roasting is all about repeating results.

When I first started, people were very nervous to share roasting tips and profiles. There was no Cropster to log, overlay and send roast profiles, or Ikawa sample roaster capable of transferring profiles through text message. There was no ‘Coffee Roaster’s Companion’. Information sharing was scarce. So, I had to rely on being ‘in tune’ with my machine.

The last few years have also brought a lot of scientifically backed research that allows us to understand how to manipulate a multitude of complex chemical reactions and achieve a sweeter, cleaner cup. There are a lot of tools and resources being introduced that help aide in this process. There seems to be a lot more of a science-feel towards roasting than what there used to be.

But, that isn’t to say we’ve progressed to the point where we can just build a recipe for roasting. There are too many variables that are different. Perception of what is “good”, roasting environments (roasting in New England with the weather changes, not fun), and roasting machines themselves (Loring vs. Probat, different location of thermocouple, thickness of thermocouple, etc, etc…) Roasters must be in tune with their machine and have the ‘feel’, that will come with (a lot) of time. But, a good foundation is built on knowledge and understanding.

Matt will be answering your Twitter roast questions until Dec 12, 2017. Post your questions on Twitter to @collaborativeCS and use the hashtag #ccsQandA.